Valigara allows exporting selected orders to Excel. Use Orders Export to create order reports, share order data with external systems, or prepare custom files for accounting, fulfillment, production, or internal analysis.
Orders can be exported using a new one-time field selection or a saved Export Format. Export Formats work similarly to Import Formats: once the field structure is defined and saved, it can be reused for future exports with the same Excel column structure.
- Export orders to Excel
- Understanding Export fields
- Create or use an Export Format
- Download the exported file
Export orders to Excel
- Go to the Orders page.
- Select the orders you want to export.
- Use searches to filter specific orders, for example by sales channel, time frame, order status, client, or other order data.
- Click Actions -> Export to Excel.
Understanding Export fields
Order export fields are divided into 3 separate blocks:
- Orders - fields with order-related data
- Clients - fields with client-related data
- Products - fields with data related to the product or products in the order
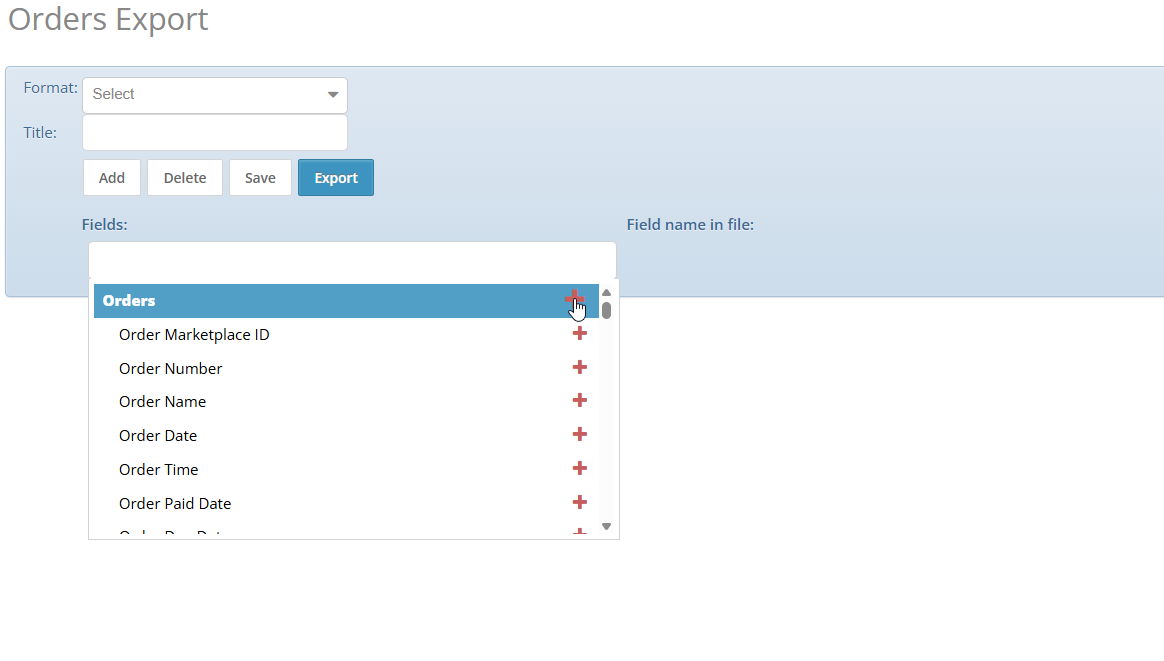
Create or use an Export Format
On the Orders Export page, choose an existing export format or create a new one.
An Export Format defines which fields will be exported and how they will appear in the Excel file. This is useful when the same file structure is needed repeatedly, for example for accounting, fulfillment, dropshipping, or ERP synchronization.
- Select how to define the format:
- Existing format - use a previously saved export structure.
- New - create a one-time export or build a new export structure.
- Select fields for export:
- Add Field - select fields to export.
- Add Free Field - specify the column name and a fixed value for all exported orders.
- Fine-tune the file structure:
- Field name in file - set the column title in the Excel sheet. By default, the exported field name is used.
- Use
 arrows to set the fields order in the Excel sheet.
- Save the format if you want to reuse the same export structure in the future.
- Click Export to start the export process.
Download the exported file
- After the export starts, open the related batch.
- Click the Download link to download the generated Excel file.

 |
|
Was this article helpful?
That’s Great!
Thank you for your feedback
Sorry! We couldn't be helpful
Thank you for your feedback
Feedback sent
We appreciate your effort and will try to fix the article